

In the past, I posted the installer project I used to build Vault apps. However, that project was for Visual Studio 2010. In the 2012 version, Microsoft dropped the installer project type and replaced it with an Install Shield project type. So I’ll share with you my latest installer template. You do not need to purchase Install Shield.
Click here to download the project source
My recommendations on how to configure:
In the solution explorer, you will see that Install Shield sets things up in numbered steps, so I’ll just go through the relevant parts, from the top on down.
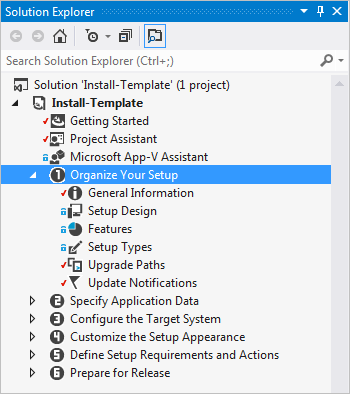
I usually just skip over the Getting Started and Project Assistant stuff. Personally, I found it more confusing than helpful.
- Organize Your Setup
- General Information
- Replace all the TODO parts. Such as ProductName, INSTALLDIR, Subject, Author and Publisher.
- Generate new values for Product Code and Upgrade Code.
- General Information
- Specify Application Data
- Files
- Rename the TODO folder if there is one.
- Put all your extension files in the [CommonAppDataFolder]\Autodesk\Vault 2015\Extensions\YourAppName folder.
- You can ignore the Database folder.
- You don’t need to put anything in the [AppDataFolder] and [CommonFilesFolder]
- Files
- Configure the Target System
- You can ignore this stuff.
- Customize the Setup Appearance
- Dialogs
- Check the dialogs that you want to show up during the install.
- Dialogs
- Define Setup Requirements and Actions
- You can ignore this stuff.
- Prepare for Release
- The SingleImage is the output type you probably want. Here are the settings I use.
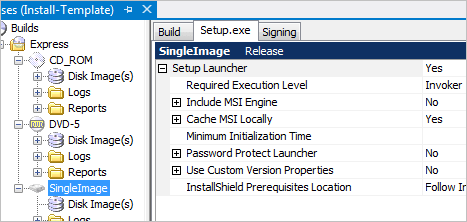
Now you are ready to build. If all goes well, you will see your setup.exe file in your output folder, which is something like [projectFolder]\Express\SingleImage\DiskImages\DISK1
Now all you have to do is zip up the EXE, post it on your blog, and wait for the money to roll in.
Leave a Reply to Mario LungCancel reply