

Everyone who writes a custom Vault Explorer command ends up with the same development environment, more or less. So I thought I would quickly go over the setup that I use, just to have it documented somewhere.
Goal
A typical development process for writing a program is 1) write code 2) build 3) debug 4) repeat. The goal of the development environment is to make those steps as painless as possible.
The development computer
There are a bunch of things you will want to have on your computer. Item 1 is the only hard requirement, but items 2 and 3 will make your life much easier.
- Visual Studio
- The Vault client. Base Vault doesn't have the ability to run custom commands. So use either Workgroup, Collaboration, or Professional depending on your requirements.
- The Vault SDK. If you don't have the Vault Server installed on your computer, copy the SDK over from the server machine.
Note: I'm using Visual Studio 2008 Team Edition. I do not know if the Express Editions have all the capabilities that I am about to go over.
Visual Studio project references
OK, your computer is set up. Now you can create your Class Library project. You will need to reference Autodesk.Connectivity.Explorer.Extensibility.dll from your Vault client's "Explorer" folder. This DLL is already part of the client. So tell Visual Studio not to copy the DLL to the output folder. 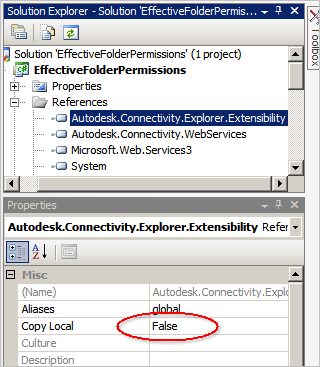
If you are making server calls, you will probably want to reference Autodesk.Connectivity.WebServices.dll from the SDK. This DLL is not part of the client, so you want to keep the default setting of having the DLL copied to your output folder.
Creating the .vcet.config file
Add a new XML file to your project and change the name to [project name].vcet.config. You can look at the SDK documentation for more information on the XML syntax. However there are some things I want to add.
If you are deploying anything more than 1 DLL, you need to set AddFolderToAssemblyProbingPath to true. In fact, you can set this to true always. I don't see a reason for ever setting this to false.
In the Visual Studio properties on the .vcet.config file, set the Copy to Output Directory setting to "copy if newer". This way, when you build, the config file goes with you. 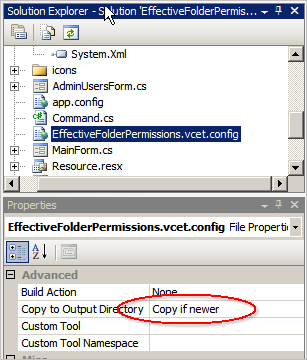
Debug settings
For debug mode, you can just set the build target to be the Extensions folder for your Vault Explorer client. (ex. C:\Program Files (x86)\Autodesk\Vault Professional 2011\Explorer\Extensions\HelloWorld\ ).
Next go to the Debug settings and set the Start Action to "Start External Program". Supply the path to your Vault Explorer EXE (ex. C:\Program Files (x86)\Autodesk\Vault Professional 2011\Explorer\Connectivity.VaultPro.exe ). And set the working folder to the EXE directory. 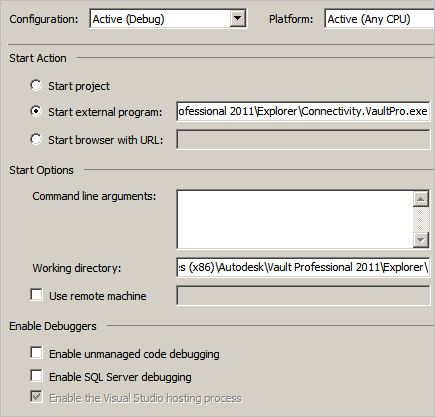
Debugging
You should be all set now. When you run in debug mode, it should start up Vault Explorer and halt at any breakpoints you set in your code. 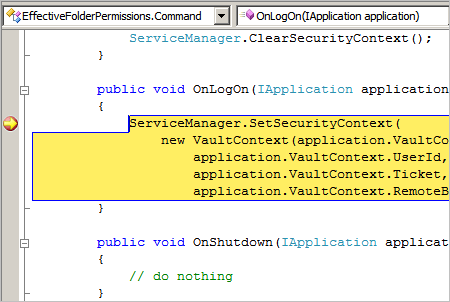


Leave a Reply